Parthians Vs Seleucids
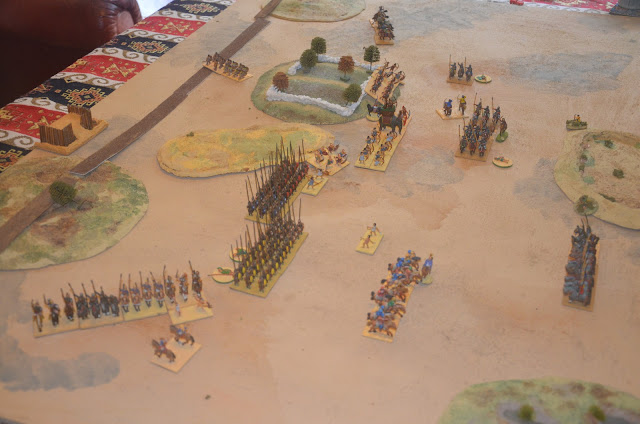
Deployment: The seleucid deployment zone is heavily encumbered with terrain. They place their cataphracts in the brush on the far left, phalanx behind the sand dune, and the elephant with medium infantry in the central plantation. The parthian's have a mix of medium and light horse archers strung out on the right, whilst on their left they have a few medium horse archers alongside a solid block of cataphracts. Their remaining cataphract command have been sent to outflank the enemy line.
Parthian Turn 1: Making use of the temporarily wide open battlefield, the parthian's ambitiously redeploy. They bring most of the medium cavalry from the right into the centre, whilst the cataphracts on the left about face and pull back to open up more room for manoeuvre. On both flanks horse archers advance far enough to fix the enemy in place and prevent any double moves.
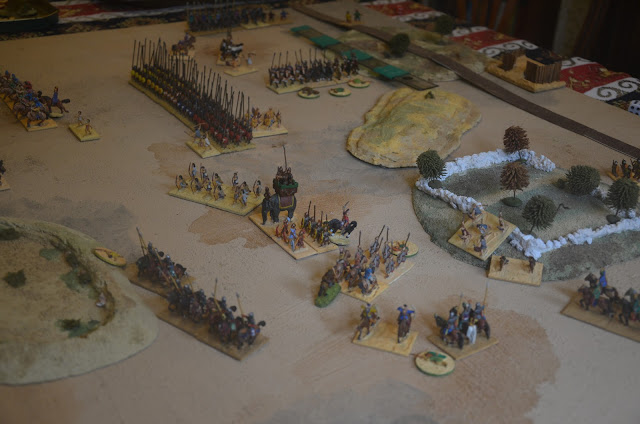
Seleucid Turn 1: The strategist splits his command, keeping the elephant and bowmen to guard the flank of the phalanx whilst light horse canter forwards to harass the rear of the enemy column. On the far flank the cataphracts pick their way slowly and carefully out of the brush.
Parthian Turn 2: The horse archers give the ponderous phalanx a volley, inflicting some nasty loses on the end of their line. Distracted by the enemies light horse, several units from the column in the centre peel off to deal with them.
Seleucid Turn 2: Protected by their elephant, the seleucid bowmen advance out of the dunes and sting the enemy horsemen with a volley. The pikemen advance to temporarily drive off the parthian horse archers, whilst the cataphracts deploy into line and wheel outwards.*
Parthian Turn 3: The missing cataphract command comes crashing in on the flank. The unfortunate seleucid cataphracts are sent reeling and retreat in confusion. On the far flank the horse archers finally turn from column to line and begin to return fire.
Seleucid Turn 3: The advance of the elephant scares away the nomad horseman, but one unit chooses to stand and give the theurophoroi a bloody nose. The cataphracts begin to coalesce again into one line, whilst the phalanx can do nothing but continue its advance and try to scatter the enemy to their front before the foes behind them can strike.
Parthian Turn 4: The cataphracts swing in and knock out an isolated enemy unit. The horse archers on the left try and squeeze out of the way of the pikemen, leaving a thin screen of cataphracts to guard the camp. On the right the horse archers turn around and deliver another volley, whilst also supporting the melee against the theurophoroi. Meanwhile a single unit of psiloi that accompanied the flank march makes an unopposed run across the brush and towards the enemy camp.
Seleucid Turn 4: The cataphracts about face and prepare to hold off the onslaught of the parthian flank attack, whilst the pikemen pin the enemy horse archers against the bad terrain. The strategist splits his force, sending the elephant towards the enemy camp, leaving some archers to guard the elephants rear, and sending the thracian's behind the line towards the enemy cataphracts.
Parthian Turn 5: The cataphracts finally slam home into their opposite number, but with indecisive results. Meanwhile the lowly light infantry have successfully snuck around to sack the enemy camp. On the left the horse archers and cataphracts form a battleline to receive the enemy pikemen. In the centre a unit of cataphracts boldly charges the enemy bowmen despite the looming shadow of the adjacent elephant. On the right the theurophoroi are finally overcome and the parthian commander pulls some of his weakened units back out of the line to prevent them routing.
Seleucid Turn 5: Constantly stung by arrows, the phalanx charge headlong into the enemy cavalry. The steppe warriors fight on tenaciously, causing some serious losses in the seleucid ranks and making the ends of their line waver. On the right the strategist boldly joins the bowmen in their fight, and aided by a unit of pikemen they overcome the cataphracts.
Parthian Turn 6: On the right the horse archers are finally free of the threat from the elephant and they explode out of their corner, cutting down a unit of bowmen and theurophoroi. In the centre the phalanx begins to crumble, opening up gaps for the cavalry to race into. Finally the cataphracts bludgeon their way through their weakened opposite numbers, and the seleucid army flees for their lives. Parthians win!
* The seleucid player failed to remember the disastrous affect a flank march can have on nearby troops in ADLG. They thought they were manoeuvring their cataphracts to counter the threat, rather than lining them up for the slaughter.


Comments
Post a Comment